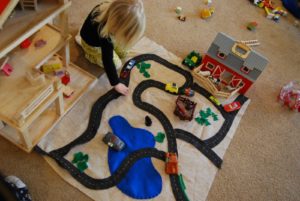
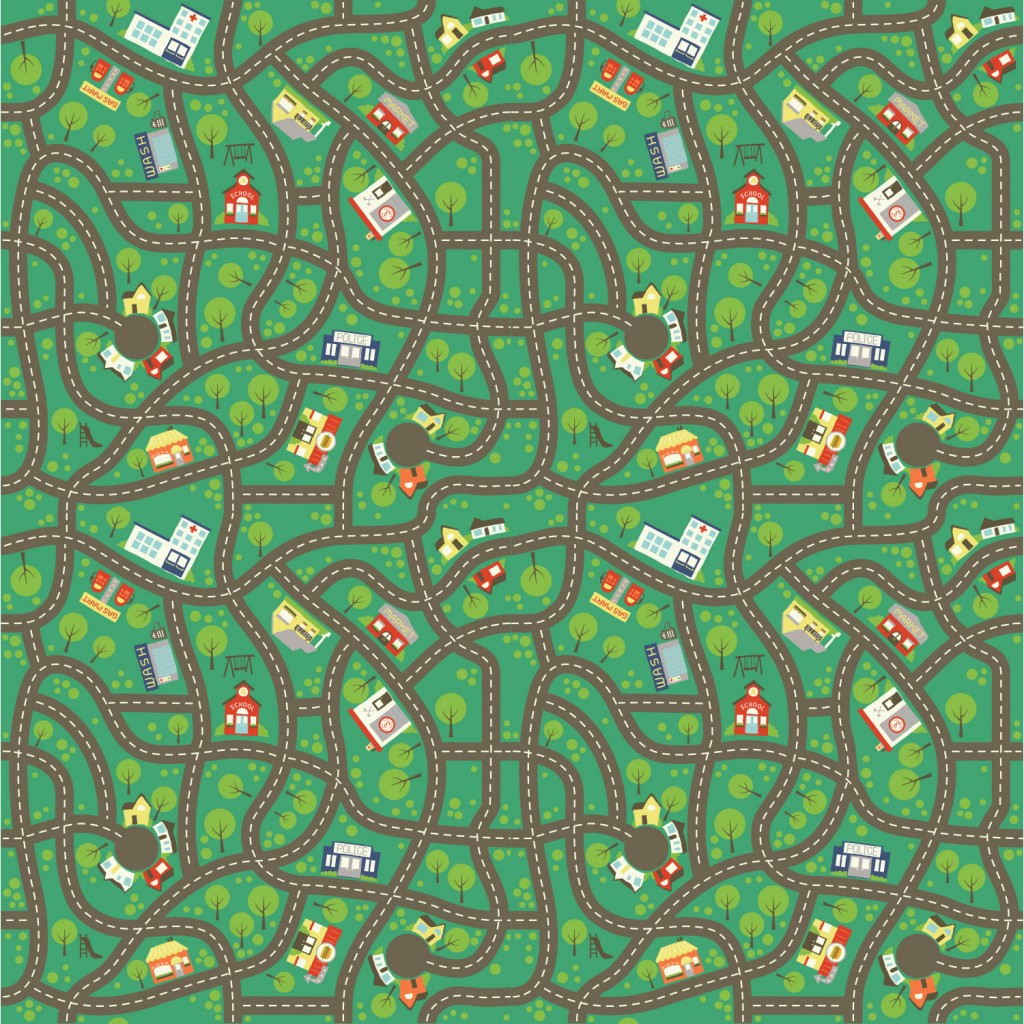
Have you seen the play mat panel that is part of Deena’s recent Wheels 2 line? Isn’t it adorable?! My “wheels” (; were spinning when I was thinking of some of the fun things that I could do with this. By adding a simple border, I was able to add customized play areas specific to my child’s interests. When I was researching play mats on Pinterest, I saw lots of great ideas and so many different ways to construct the mat….we will discuss them in detail (:
So, let’s get started!
Let’s talk first about the methods to creating the play mat. Deena’s panel is canvas , a really nice weight, not too stiff. Of course, it goes without saying that the simplest way to finish this mat is to sew a narrow turned hem around all edges. The mat is designed to be 35 x 37 finished. One of the cool design elements of the mat is that all the road repeats match up, so you can make a REALLY big play mat – 70 x 74!!
I wanted to customize my play mat, so I added the border. I used home dec fabric with a weight to match the panel. However, I also used some of the Wheels 2 prints for some of the sections of the border, in order to give those prints more weight, I fused a lightweight interfacing to them (minus the seam allowances). I also used home dec solids for all the applique pieces with a fusible backing and I machine sewed all appliques with clear monofilament thread.
I considered using felt for all the applique pieces and hot gluing them all down – omitting almost all the sewing. Felt is awesome because it doesn’t fray, and it comes in so many colors. However, felt does not stand up to washing – even if I stitched it down, it gets kind of funky after it is washed. Since I knew this mat is living it’s life on a floor, I wanted to make sure I could machine wash it. If you want the play mat to come together a little faster, and you are not planning on machine washing, I think the felt/hot glue is a great option that should hold up to some decent play time. Cotton prints and solids would also work great for all the applique pieces, but they will fray, so they must be sewn down.
Originally, I thought I would just sew a Wheels 2 print to the back – just to make it look finished and pretty (since there would be exposed seams around my border). I was not planning on binding it either, I was just going to sew it like a pillow and turn it right side out to finish the edges. But once I had all the borders sewn on, it was a bit uneven and wavy, and I noticed as my 7 year old was playing on it, it would bunch and shift too much. So I decided it needed some batting and quilting to make it easier for a kid to move a car easily across the mat, and help it stay in place if he was crawling around on top of the mat. I backed mine with flannel, to really keep it in place on carpet. If you have a play area that is tile or wood, I think a great backing would be the stuff that pajama feet are made of, with the little rubber dots for traction….I think it’s called grip stop. I was really happy that I added the batting and binding, it just adds some stability and durability. If you want to use the mat as an on-the-go toy, I probably would not use the batting, since it does make the play mat a bit bulky.
The last thing I would HIGHLY recommend is using monofilament thread for all your applique and quilting. I used a lot of different colors to create the appliques, and changing thread for each of these would have been a monumental pain! Instead, I was able to just zip around everything so quickly, and it is almost invisible (you can only see it if you are looking at just the right angle). Since some of you may have never used monofilament thread, I am going to digress a little, and discuss in some detail. I found this great post with all the pros and cons of the different types of monofilament thread, if you have time, I would suggest you check it out – Quilting with Clear Thread.
There are two types of monofilament thread, one is polyester, the other is nylon. I prefer a brand made from polyester, because it has a high heat tolerance (nylon thread can melt at high temps…..that would be a REAL bummer!) I have been using Superior Threads and LOVE it. It has never broken while sewing, I have never had any tension issues, and it does not have any shine to it, so it really is invisible. You can purchase it online or perhaps some of your local quilt shops carry it. If not, another brand that has had good reviews is Sulky, and can be purchased at your big box fabric shop.
The other cool thing when sewing with monofilament thread is that you do not need to use it in your bobbin (you can, but it creates some issues…refer to the Quilting with Clear Thread post listed above for the details). Instead, I did change out my bobbin thread to match the BORDER background (NOT the applique colors), so I used 3 colors – white, green, and brown in my bobbin. It is suggested that you tighten your bobbin tension slightly, my Bernina has an extra spot to thread my bobbin thread to accomplish this, so it is uber easy. Check your machine user guide to see how to do this for your machine. I would try a test piece with regular tension…you may not even need to do this step…and if you’re like me I HATE messing with my machine tension!
Now let’s get to the fun part….creating your custom border! I had so much fun looking at what others had done, and I love the idea of creating something unique to your child and their play interests. Deena’s Wheels play mat covered most of the bases and already has the following –
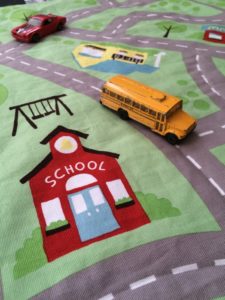
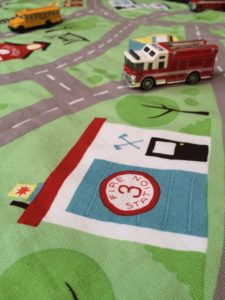
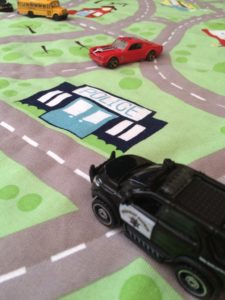
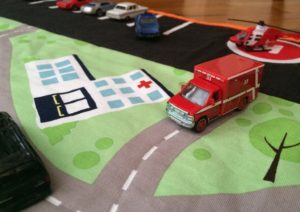
as well as a Gas Station, Car Wash, Market, Gift Shop, Hamburger and Pizza Joints!
I think adding items that your child can identify with really “ups” the creative play. Here are some ideas I considered –
Airport, Train, Race Track, Beach, City, Swimming Pool, Museums, Zoo, Library, Stadium, University, Church, Park, Forest, Stores and Shops, more Houses….the list can go on and on!
I chose to add a ……
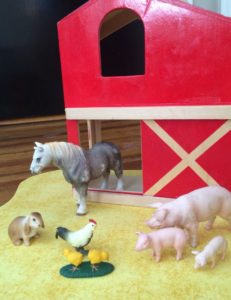
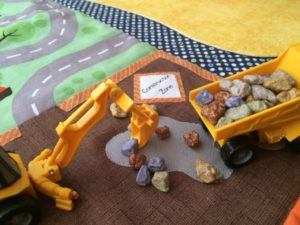
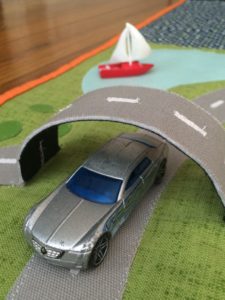
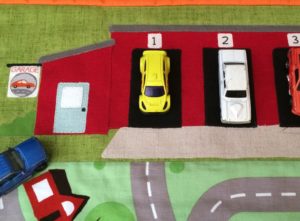
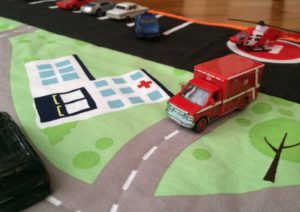
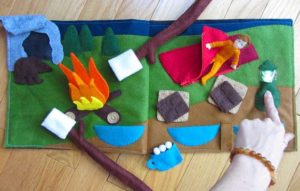
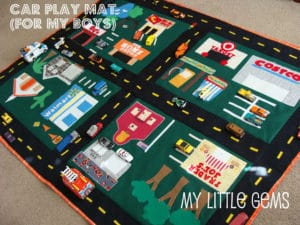
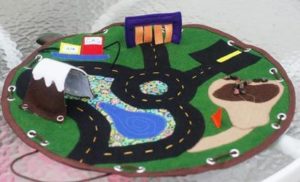
I love the idea of making the play mat VERY specific to what your child sees around them. Do you live in a large city? Do you live in farm country? Do you live near the ocean or a lake? Do you live near the mountains or forest, or love to camp? Where do you work? Here are some great examples of how others have done just that –

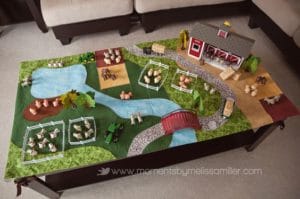
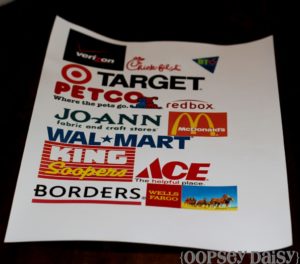
This idea makes customizing your play mat MUCH easier. She simply found the logo, re-sized it for her buildings, put them in a word document and then copied onto fabric transfer paper that you can buy at a big box fabric store or office supply store. I used this method to create some of my signs because they were too small to cut out and applique.
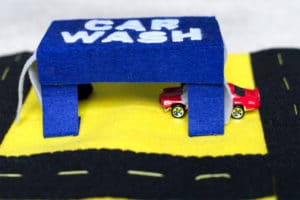
Adding some dimension to the play mat is a fun idea, like these examples –

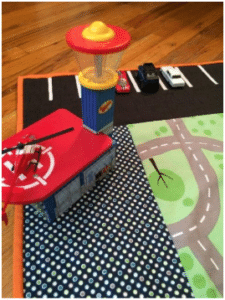
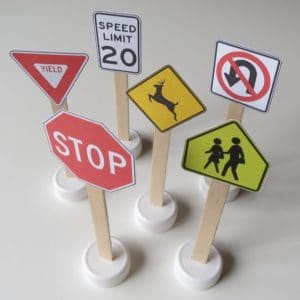
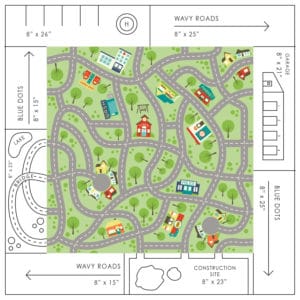
Now that we have explored some ideas, you will need to plan out your borders. I used this mock-up to plan mine, and it is included as part of the applique pattern in Deena’s Etsy shop. You could fill the entire border with customized play areas, but for mine I chose to mix in some Wheels 2 prints.
And oh….. I could do a whole-nother blog post on how to store and pack your play mat and cars, but instead I’ll leave you with this fun tutorial we did with Deena’s Scoot line –
Deena Rutter Car Caddy Tutorial
I would suggest reading thru entire post before buying your supplies, your supply list may differ from mine based on your custom border.
Supplies
Approx. Finished Size: 48 x 50
Wheels Play Mat Applique Pattern in the Etsy shop, $5 instant download
Wheels Play Mat Panel, available in Green, Tan, or Brown for $10.50 each in the Etsy shop
1 yard Heat n Bond Lite
1 yard lightweight fusible interfacing (if using any cotton prints for borders)
1/8 yard Peltex (Pellon 72F), a double sided fusible ultra firm stabilizer
**If you are unfamiliar with Peltex, check it out here
1 inch section of Velcro
Monofilament thread (see info above)
1/4 yard EACH Wheels Wavy Road, Wheels Dot, Home Dec solid in Black, Brown, and Green for borders
3 yds for backing (yardage can be reduced if using a scrappy back or 108″ wide)
1/2 yd for binding
52″ x 52″ thin batting (80/20 or 100% cotton, do not use high loft batting)
1/8 yard or small scraps for appliques of various home dec, quilting cotton, or felt solids, suggested colors –
Gray (color should match the road on the panel); White; Dark Green; Red; Black or VERY dark gray; Light Blue; Orange
STEP 1
Purchase the applique pattern (Includes pieces for the hospital parking lot, the garage, the construction site, and the road with bridge and pond)
Purchase Wheels 2 Play Mat panel, and coordinating Wheels 2 prints from the Etsy shop.
STEP 2
Using the blank border mock-up in the pdf pattern, sketch your desired border layout. When planning borders, do not have a border seam butt up to one of the roads leading off the edge – stagger the seams where there are no roads.
STEP 3
Cut border strips.
All borders are 8″ wide. I gave approximate measurements for my borders above with some wiggle room – so the ends will need to be trimmed after sewing to the main panel. If you have chosen a different layout, start with your applique blocks, and then cut any “filler” blocks after the appliqued blocks are completed. Cut borders a little longer than needed, then trim to size after sewn.
If you are using the Wheels 2 prints, or any other cotton print, fuse the lightweight interfacing to the back (minus the seam allowance). **I did this step after I sewed all the borders together since I was not sure what the finished length would be, and it worked out great.
STEP 4
Prepare all applique pieces.
To prepare applique pieces with Heat n Bond , first cut identical pieces of both the fabric and fusible, following the manufacturer’s directions, fuse to the wrong side of fabric (DO NOT use steam). Then trace pattern in REVERSE on the WRONG side of fabric. Cut out all pattern pieces. – you may want to work on one panel at a time.
If you have created some of your own blocks, prepare your pattern pieces and appliques now.
STEP 5
Fuse appliques to border blocks.
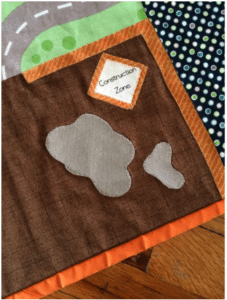
In the pdf pattern there are 4 applique blocks – the hospital parking lot, the garage, the construction site, and the road with bridge and pond. It is easier to apply all appliques BEFORE it is sewn to the panel or other border pieces. Just be sure to apply the appliques at least 1″ away from all edges (exception – white parking stripes in the hospital parking lot should be close to the edge). Orange construction tape is appliqued AFTER the borders have been sewn to the panel. If some of the small pieces do not fuse well, use some white school glue to tack them down.
STEP 6
Machine stitching all appliques.
Thread the monofilament thread onto your machine. Match your bobbin thread to the color of the border block. Note: you may want to do a sample on a test piece to make sure you do not have any tension problems. It is suggested that you slightly tighten your bobbin tension. Change your stitch to a very narrow zig zag. On my machine it is a 1.5 width by 2.0 length. Now start stitching around EVERY applique piece…this is kind-of fun, because if you mess up a little, no one can tell because the thread is almost invisible. Try to keep the zig zag so one stitch catches the applique, and the other catches the background….but don’t stress. When you are done sewing all pieces, go back and look for “skips” and simply go over those areas again to catch all edges. Be sure to back-stitch and trim the monofilament thread as you go (it’s really easy to miss some tails since it is hard to see).
For some of the very fine appliques like the road dashes, I REALLY sewed them down – I went down the left edge, then thru the middle, and then down the right edge, so those should not go anywhere! I also did not cut my thread with each road dash -I simply lifted my needle, and then moved the block to the next dash, put the needle down and began to sew the next dash. When they were all done, I went back and clipped the threads.
STEP 7
Sewing the bridge
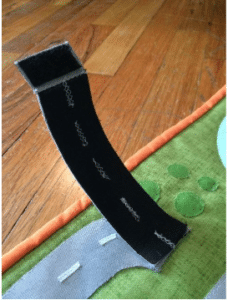
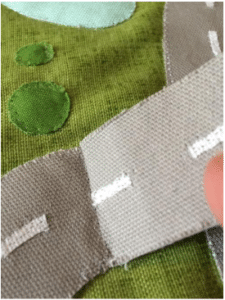
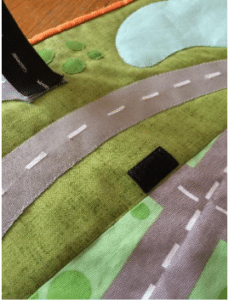
First, sew the road down to the block, leaving the bridge as a”flap”, sew across the road where the bridge will begin (Be sure to applique the road dashes BEFORE sewing it down to the block). Hem the end of the bridge flap. Take your piece of Peltex and cut to the exact size of the road. Cut an identical sized piece of fabric for the underside of the bridge from the fabric you used for the road (I used black). Following the manufacturer’s directions, fuse the Peltex between the top and bottom of the bridge flap. Sew top half of the velcro strip to the bridge hem. I would wait to sew the bottom half of velcro to the block once you have sewn all borders to the main panel for a more precise placement. Note: Peltex is a great product if you want to make a mountain tunnel or some other 3-D feature.
STEP 8
Sew the border
Once all your applique blocks are completed, sew each block together based on your block layout, using a generous 1/4″ seam, and pressing all seams OPEN to reduce any bulky edges that might stop a car. Then sew each side to the main panel as shown below (if your block layout differs from the pattern, this diagram may not work for you).
STEP 9
Applique the orange construction tape to the construction block. I did not sew any to the bottom of the block because my binding was orange.
STEP 10
Sew backing and quilt if desired
If you wish to quilt the play mat, sew your backing about 2″ larger than your top. You will need to piece the backing since it is wider than 42″, you may want to purchase a piece of 108″ wide fabric to omit any seams (reduce backing yardage if you choose this option). Make your quilt sandwich with your batting and baste (normally I like to spray baste, but this was so small, I pin basted).
I quilted the play mat with the monofilament thread, and matched the bobbin thread to my backing. Again, this was fun! I stitched in the ditch around all border seams. Then I stitched around the edges of the appliqued areas to secure the border pieces. For the wavy road borders I followed the wavy road, and for the dot borders, I straight stitched about 1 1/2″ apart. In the center panel, I followed the dashed lines in most of the roads, being sure to get good coverage from top to bottom and side to side (I did not need to quilt EVERY road, but you could if you wish). The monofilament thread gives a very subtle quilted effect, and does not interfere with the movement of the cars, in fact, it helps.
STEP 11
Machine bind
First, square up the entire top. I started with 8″ borders, and by the time I had squared-up and bound the quilt, the borders were 7″.
If you are binding the play mat as I did, prepare your binding strips. I would recommend machine binding over hand binding for durability. I cut my binding strips 3″ wide, and I’m glad I did, as this is a little more bulky than a normal quilt (if you are really good at binding, 2 1/2″ will probably work for you). I am not going to give directions for machine binding, as there are so many out there, my favorite is Allison’s at Cluck Cluck Sew.
ALL DONE! Isn’t it cute?!
If you machine wash, I would suggest a delicate cycle and line drying to minimize any threads from fraying.
